
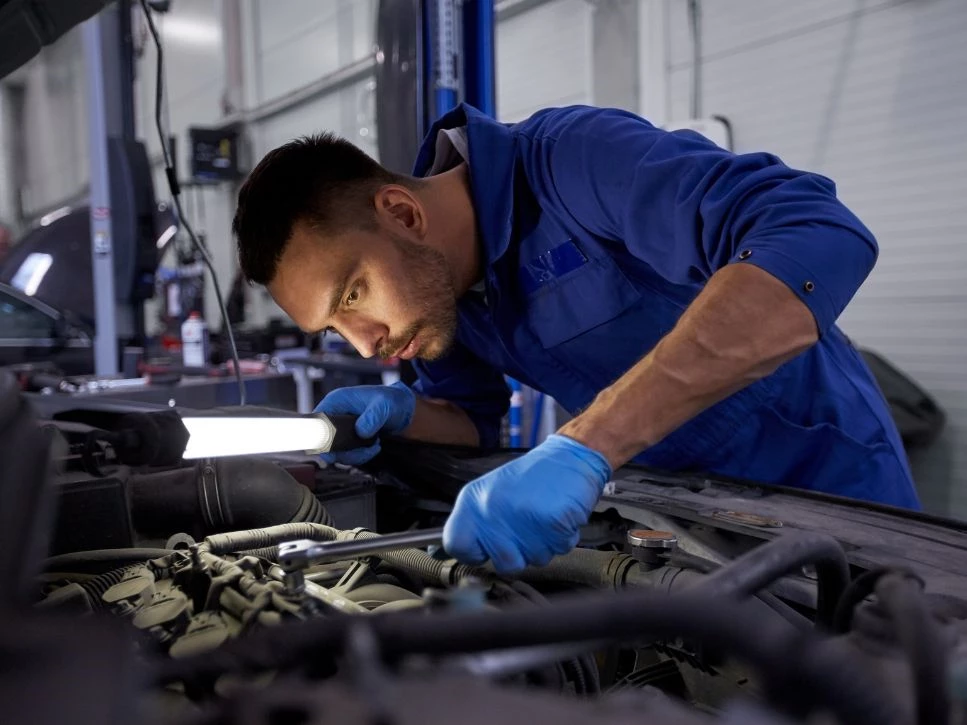
Introduction
The charging system in your vehicle plays a crucial role in keeping your battery ready to power your car when you need it most. This section is your road map to understanding and maintaining this vital component.
We’ll take a practical and straightforward approach to unraveling the intricacies of the charging system. Our aim is to empower both technicians and everyday vehicle owners to confidently diagnose and repair issues like undercharging, overcharging, and complete system failure.
Our guide is designed with simplicity and clarity in mind, making it accessible to all. We’ll walk you through essential tasks and procedures that will equip you with the knowledge needed to effectively maintain and repair your vehicle’s charging system. By gaining a deeper understanding of how it all works, you can ensure the long-term health and reliability of your vehicle’s electrical components.
The result? A better ownership experience and enhanced performance on the road. So, let’s dive in and demystify the charging system, ensuring you have the tools and insights to keep your vehicle running smoothly.
Task D. 1 - Diagnose Charging System Problems That Cause an Undercharge, a No-Charge, or an Overcharge Condition
A properly functioning charging system is essential for the smooth operation of a vehicle. This system ensures that the battery receives a consistent and adequate charge. However, issues may arise that lead to an undercharge, no-charge, or ovei charge condition. In this section, we will discuss the common causes of these problems, the symptoms to look for, and how to diagnose and resolve the issue.
Undercharge Condition:
-
An undercharged battery is often the result of a defective voltage i egulator or alternator. This can lead to a reduced charging rate, which ultimately affects the battery’s performance. Additionally, a loose alternator belt or excessive resistance in the wire from the alternator battery terminal to the positive battery terminal can contribute to this problem.
-
To diagnose an undercharge condition, technicians should first inspect the voltage regulator and alternator for any signs of damage or wear. If these components appear to be in good condition, the technician should then check the alternator belt for proper tension and look for any signs of excessive resistance in the wiring.
Overcharge Condition:
-
An overcharged battery is typically caused by a defective voltage regulator, which allows high charging circuit voltage. This can lead to shortened battery life and potential damage to other components in the charging system.
-
To diagnose an overcharge condition, technicians should first inspect the voltage regulator for any signs of damage or wear. If the voltage regulator appears to be functioning correctly, the technician should then check the alternator for any issues that may be causing excessive voltage output.
No-Charge Condition:
-
A no-charge condition can result from an open alternator field circuit or an open fuse link in the wire leading from the alternator battery terminal to the positive battery terminal. This can leave the battery unable to receive a charge, leading to a dead battery and potential vehicle breakdown.
-
To diagnose a no-charge condition, technicians should first inspect the alternator field circuit and fuse link for any signs of damage or wear. If these components appear to be in good condition, the technician should then check the wiring for any signs of an open circuit.
In conclusion, diagnosing charging system problems that cause an undercharge, a no-charge or an overcharge condition involves a thorough inspection of the voltage regulator, alternator, belts, and wiring. Once the issue has been identified, the appropriate repairs can be made to ensure the charging system operates correctly and maintains the battery at an optimal level.
Task D. 2 - Inspect, Adjust, and Replace Generator (Alternator) Drive Belts, Pulleys, and Tensioners
The generator, or alternator, drive belts, pulleys, and tensioners are crucial components in the charging system of a vehicle. They help transfer mechanical energy from the engine to the alternator, which then converts it into electrical energy to charge the battery. In this section, we will discuss the importance of inspecting, adjusting, and replacing these components as needed to maintain a properly functioning charging system.
Inspecting Generator Drive Belts, Pulleys, and Tensioners:
-
A technician should regularly inspect the generator drive belts for signs of wear, such as cracks, fraying, or glazing. Additionally, they should check for any oil or grease contamination, which can lead to slipping and reduced charging efficiency.
-
Pulleys should be examined for any signs of damage or wear, such as grooves or misalignment. Misaligned or damaged pulleys can cause excessive wear on the drive belt and decrease charging efficiency.
-
Tensioners should also be inspected for signs of wear or damage. A worn or damaged tensioner may not provide the correct tension for the drive belt, leading to slipping and reduced charging efficiency.
Adjusting Generator Drive Belts, Pulleys, and Tensioners:
-
Proper belt tension is crucial for optimal charging system performance. A belt with insufficient tension can slip, causing an undercharged battery. Technicians can use a belt tension gauge or measure belt deflection to ensure the proper tension is maintained. A belt should have 0.5 in (12.7 mm) of deflection for every foot (30.5 cm) of free span.
-
Many serpentine belts utilize an automatic spring-loaded tensioner with a belt wear scale. This tensioner should be inspected for proper operation and signs of wear. If necessary, adjustments or replacements should be made to ensure the belt tension remains optimal.
Replacing Generator Drive Belts, Pulleys, and Tensioners:
-
If a technician finds any signs of wear or damage during the inspection process the affected components should be replaced. Worn or damaged drive belts, pulleys, and tensioners can decrease charging system efficiency and lead to further damage if left unaddressed.
-
When replacing a drive belt, ensure that the new belt is of the correct size and type for the specific vehicle application. Properly route the belt around the pulleys, and adjust the tension as needed.
In conclusion, inspecting, adjusting, and replacing generator drive belts, pulleys, and tensioners are essential steps in maintaining a properly functioning charging system. Regular inspection and timely replacement of worn or damaged components can prevent issues such as undercharged batteries and potential vehicle breakdowns.
Task D. 3 - Perform Charging System Output Test; Determine Needed Repairs
A charging system output test is a crucial diagnostic procedure that helps technicians determine the efficiency and overall health of a vehicle’s charging system. In this section, we will discuss the steps involved in performing a charging system output test and how to interpret the results to determine the needed repairs. Before performing an output test, technicians should first ensure that the alternator belt tension and condition are optimal. All vehicle accessories should be turned off during the test to prevent interference with the results.
To Perform a Charging System Output Test, Follow These Steps:
- Connect a carbon pile load in the volt-ampere tester to the vehicle’s battery.
- Start the engine and allow it to reach operating temperature.
- Set the carbon pile load to maintain the voltage below 15V while the alternator is full-fielded.
- Record the voltage and current readings.
The alternator output can be tested by lowering the voltage to the value specified by the vehicle manufacturer. If the output is within the specified range, the charging system is functioning correctly. However, if the output is lower or higher than the specified range, further diagnosis is required to identify the cause of the problem.
Low output may indicate issues with the diodes or stator or high resistance in the field winding. In this case, a technician should inspect and test these components and replace them if necessary. If the output is higher than specified, the issue could be with the voltage regulator, which may require replacement.
In conclusion, performing a charging system output test is an essential diagnostic tool for identifying issues with a vehicle’s charging system. By interpreting the test results and addressing any identified issues, technicians can ensure that the charging system operates efficiently and maintains the battery at an optimal level.
Task D. 4-Perform Generator (Alternator) Output Test; Determine Needed Repairs
A generator (alternator) output test is a critical procedure that helps technicians assess the performance of the alternator and identify any potential issues. In this section, we will discuss the process of performing a generator output test and how to interpret the results to determine the needed repairs.
To perform a generator output test, technicians should use a commercially available charging system tester, such as a VAT-40 or similar device. The tester should be connected to the vehicle’s battery and alternator according to the manufacturer’s instructions.
Follow these steps to perform a generator output test:
- Start the engine and allow it to reach operating temperature.
- Full-field the alternator by bypassing the voltage regulator. Note that the alternator should never be full-fielded for more than 30 seconds.
- Observe the output reading on the charging system tester.
If the output is zero during the test, the field circuit is likely to open. This issue is commonly caused by worn brushes or an open field winding in the rotor. In this case, technicians should inspect and replace the brushes or rotors as necessary.
If the output is less than specified, the issue may be with the diodes or stator, or there may be high resistance in the field winding. Technicians should inspect and test these components and replace them if needed.
During an alternator full-field test for output assessment, the voltage regulator is temporarily bypassed, allowing a direct evaluation of the alternator’s performance without its influence. Should the output voltage exceed specified levels during this test, it indicates a potential defect in the voltage regulator, which might necessitate replacement.
In summary, conducting a generator output test proves to be an invaluable diagnostic tool for uncovering potential issues within the alternator. By carefully interpreting the test results and promptly addressing any identified problems, technicians can guarantee the alternator’s efficient operation, ensuring the battery remains consistently charged at an optimal level. This not only enhances vehicle performance but also contributes to the longevity of essential electrical components.
Task D. 5 - Inspect, Test, or Replace Voltage Regulator/Regulating Circuit; Determine Needed Repairs.
The voltage regulator plays a crucial role in maintaining a consistent and appropriate charging voltage for the vehicle’s battery. It is essential to inspect, test, and replace the voltage regulator or regulating circuit as necessary to ensure the proper functioning of the charging system. In this section, we will discuss the process of inspecting, testing, and replacing the voltage regulator and regulating circuit.
Inspecting the Voltage Regulator:
- Technicians should visually inspect the voltage regulator for any signs of damage, corrosion, or loose connections. If the regulator is externally mounted, ensure that all connections are clean and secure.
Testing the Voltage Regulator
- To test the voltage regulator, full-field the alternator by bypassing the regulator. If the alternator’s current and voltage output are within normal range while full- fielded, the voltage regulator may be defective. If the charging system voltage is higher than specified, the voltage regulator is likely defective. On a charging system with an external regulator, excessive resistance in the field circuit between the ignition switch and the regulator could also cause this issue.
Replacing the Voltage Regulator:
- If the voltage regulator is found to be defective during testing, it should be replaced to ensure proper charging system operation. Follow the vehicle manufacturer’s guidelines for replacing the voltage regulator, and make sure to use the correct replacement part for the specific vehicle application.
Task D. 8 - Remove, Inspect, and Replace Generator (Alternator).
Removing, inspecting, and replacing the generator (alternator) is a crucial task in maintaining a properly functioning charging system. In this section, we will discuss the process of removing, inspecting, and replacing a generator (alternator).
Removing the Generator (Alternator):
Before removing the alternator, disconnect the negative battery terminal. If the vehicle is equipped with an airbag system, wait for the time specified by the vehicle manufacturer, and then begin the alternator removal procedure. Follow the vehicle manufacturer’s guidelines for removing the alternator, which may include detaching the electrical connections, loosening the tensioner, and removing the mounting bolts.
Inspecting the Generator (Alternator):
- Once the alternator is removed, visually inspect it for any signs of damage, corrosion, or wear. Check the brushes, rotor, diodes, stator, and other components for wear or damage. If any issues are identified, the affected components should be repaired or replaced as necessary.
Replacing the Generator (Alternator):
- If the inspection reveals that the alternator needs to be replaced, follow the vehicle manufacturer’s guidelines for selecting and installing a new alternator. Make sure to use the correct replacement part for the specific vehicle application. When installing the new alternator, ensure that all electrical connections are clean and secure and that the mounting bolts are properly tightened. After installation, reattach the negative battery terminal and start the engine to verify that the new alternator is functioning correctly.
Removing, inspecting, and replacing the generator (alternator) is an essential task in maintaining a properly functioning charging system. Regular inspection and timely replacement of a damaged or worn alternator can prevent issues such as undercharged or overcharged batteries, ensuring that the vehicle’s electrical system operates efficiently.
In summary, the process of diagnosing and repairing the charging system of a vehicle is critical for maintaining its overall health and functionality. Each of the tasks outlined in this document plays a vital role in ensuring that the charging system operates efficiently and effectively. By following the detailed instructions provided for each task, technicians can accurately identify and address any issues that may arise in the charging system.
It is important to remember that the proper functioning of the charging system is crucial for maintaining the vehicle’s battery, ensuring that it remains charged and ready to provide power when needed. Regular inspection, testing, and maintenance of the charging system components can help prevent issues such as undercharging, overcharging, or complete system failure.
As an ASE A6 technician, it is essential to stay up-to-date with the latest diagnostic techniques and repair procedures to provide the best possible service to your customers. By following the guidelines outlined in this document and referring to the specific vehicle manufacturer’s recommendations, you can ensure that your work meets the highest professional standards.
Remember to always prioritize safety when working with vehicle electrical systems. Disconnect the battery before performing any work on the charging system, and follow all necessary precautions when working with high-voltage components.
With this comprehensive guide to charging system diagnosis and repair, you now have a valuable resource to help you tackle any charging system issues that may arise. By following the detailed steps provided for each task and using the suggested graphics and tables to illustrate key concepts, you can effectively communicate this information to a general audience in a clear and concise manner.
By sharing this knowledge with the general public, you can help educate vehicle owners about the importance of regular charging system maintenance and the critical role it plays in the overall health of their vehicle. This information can empower vehicle owners to make informed decisions about the care and maintenance of their vehicles, leading to a better overall ownership experience and increased customer satisfaction.
The Key Takeaways
Here are the Key Takeaways from this Section:
- Regular inspection and testing of the charging system are crucial for maintaining a properly functioning vehicle.
- Diagnosing charging system issues may involve identifying under charge, no¬charge, or overcharge conditions and determining their causes.
- Proper tension and condition of the generator (alternator) drive belts, pulleys, and tensioners are essential for effective charging system operation.
- Performing charging system output tests and generator (alternator) output tests can help identify issues and guide needed repairs.
- Inspecting, testing, and replacing voltage regulators or regulating circuits can resolve erratic or incorrect charging system voltages.
- Charging circuit voltage drop tests can identify excessive resistance, leading to undercharged batteries and necessary repairs.
- Inspecting, repairing, and replacing connectors and wires in charging circuits can prevent electrical issues and maintain system efficiency.
- Removing, inspecting, and replacing the generator (alternator) when necessary ensures proper charging system performance.
- Always prioritize safety when working with vehicle electrical systems and follow the vehicle manufacturer’s guidelines and recommendations.
- Educating vehicle owners on the importance of charging system maintenance can lead to better overall ownership experiences and increased customer satisfaction.
Summary
In summary, this section offers a comprehensive guide for ASE A6 technicians, equipping them with the knowledge and skills to diagnose and repair a wide range of issues within a vehicle’s charging system.
The section details essential tasks, including diagnosing charging system problems, inspecting and replacing generator drive belts and associated components, performing charging system output tests, examining and replacing voltage regulators, conducting voltage drop tests, and inspecting and repairing connectors and wires. Furthermore, it provides instructions for the removal, inspection, and replacement of the generator (alternator).
By diligently following these detailed guidelines, technicians can accurately pinpoint and resolve charging system issues, ensuring the overall health and functionality of the vehicle. This information is a valuable resource for both professionals and the general public, emphasizing the significance of regular charging system maintenance in sustaining vehicle performance and longevity.
Good Luck!
You may also like:
👉 he complete ASE practice test with answers and explanations
👉 Mastering ASE Testing - The Ultimate Guide for Success
👉 Mastering Electrical and Electronic Systems Diagnosis
👉 Batteries - The Heart of Vehicle Power - Diagnosis and Service
👉 Ignition Unveiled - Starting System Diagnosis and Repair
👉 Illuminating the Road - Lighting Systems Diagnosis and Repair
👉 Monitoring and Alert Systems - Gauges, Warnings, and Driver Info Diagnosis


